Replace Windows 10 Volume Icon!
Today I really had it with the default “Windows 10 Volume OSD” (On Screen Display).
That day I learned about Volume2. Volume2 allow a user running Windows 10 (Maybe also Windows 11?) to both replace / remove the OSD.
Not only that I’ll also show you how to hide the default icon in Windows to allow Volume2 totally to take over the job as “Volume Icon”. 🔊
Join the Volume2 Club: Elevate Your Audio Experience⌗
Are you ready to elevate your audio experience and become a part of the Volume2 club? If so, you’re in luck! Joining the club is a breeze, and all you need to do is follow these simple steps:
Visit the Volume2 Release Site on GitHub: Head over to the official Volume2 release site on GitHub to access all the necessary resources.
Download the Latest Release: From the release site, download the latest version of Volume2 by clicking on the appropriate download link.
Installation: Once the download is complete, install Volume2 on your system using the standard installation process, just like any other program.
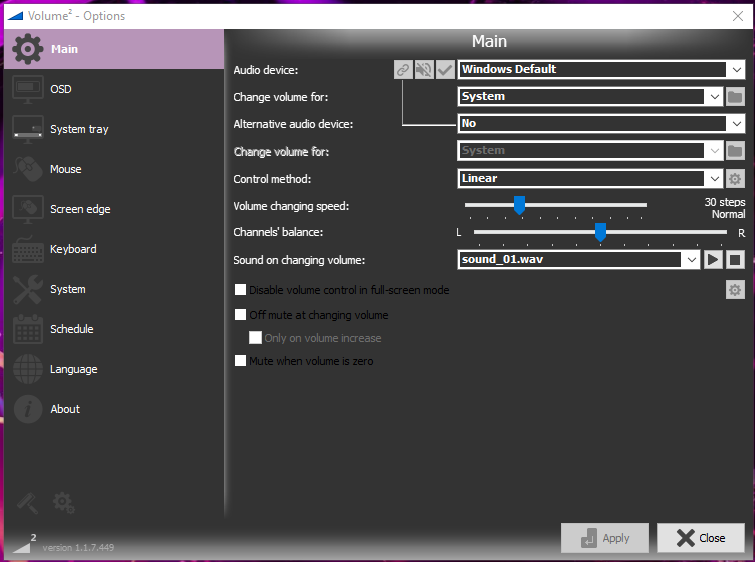
Configure Auto-Start with Windows: During the installation, make sure to enable the setting that allows Volume2 to start automatically with Windows. This ensures that you have seamless access to its powerful features right from the moment you power on your computer.
Tip: Enabling auto-start replaces the default Volume Icon with Volume2’s feature-rich counterpart, offering enhanced sound control and customization options.
In future blog posts, we’ll dive deeper into the exciting features and functionalities that Volume2 has to offer. Stay tuned to discover how Volume2 can transform your audio experience and take it to new heights.
So, what are you waiting for? Embrace the Volume2 club and unlock a world of audio excellence.
Download the latest release of Volume2 today and experience a whole new level of audio immersion.
Remove Default Volume Icon⌗
Okay, next up is removing the default Windows Volume Icon to make this a seam-less integration.
It’s a bit tricky and requires access to the Local Group Policies on the machine.
Open Local Group Policy Editor via the Run Command⌗
Another easy way to open apps and programs on your Windows device is through the Run dialog box. Here’s how you can open the Local Group Policy Editor using the Run tool.
Press Win + R to open the Run dialog box.
Type gpedit.msc in the text box and click OK or press Enter to open the Local Group Policy Editor.
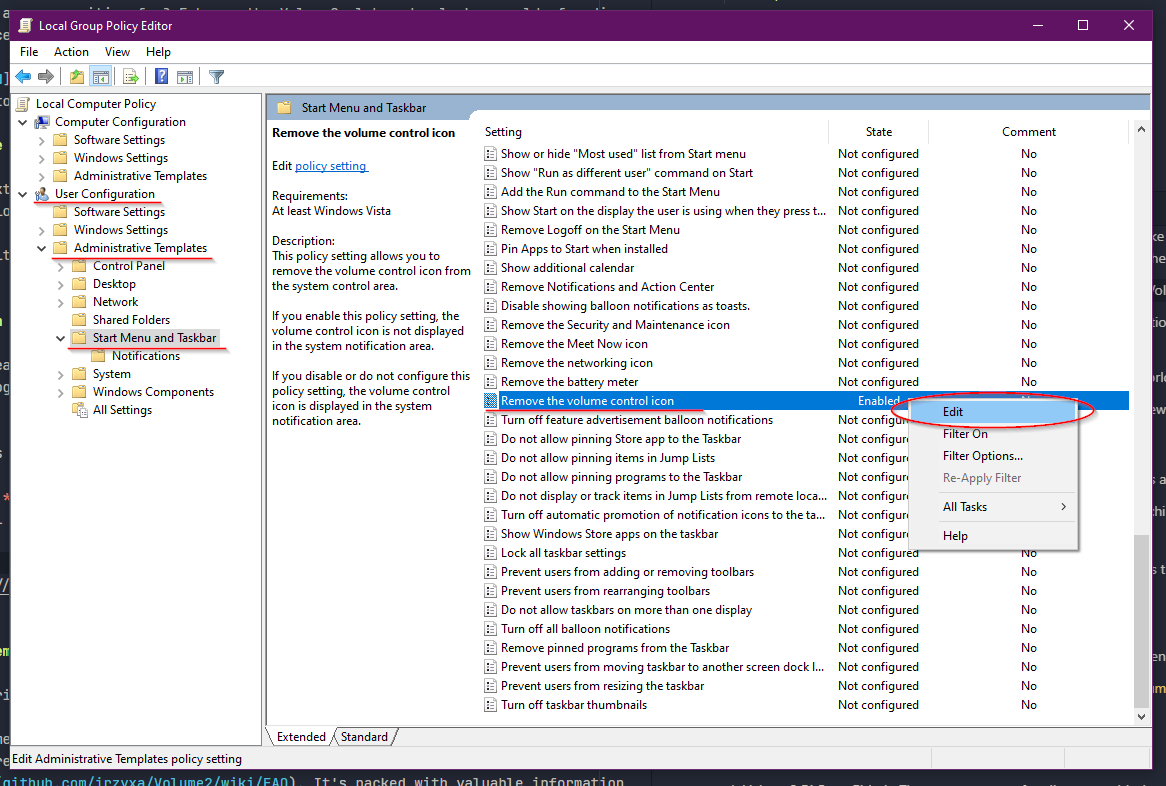
Find the policy⌗
You the have to find and edit and enable the policy for showing the volume icon in the system tray.
Reload policy⌗
Now you have two options:
Reboot / Log out and back in.
Open a command prompt and run:
gpupdate /target:computer /force

Now the default Volume Icon should be gone!
Problems?⌗
Encountering issues with Volume2? Fear not!
Volume2 FAQ on Github: The go-to resource for all your troubleshooting needs is our comprehensive FAQ site hosted on Github. It’s packed with valuable information and solutions to common issues. Simply head over to the site and browse through the frequently asked questions to find quick answers to your queries. We’ve put a lot of effort into compiling a list of common stumbling blocks, so chances are you’ll find the help you need right there.
Reach out to us on Twitter: If, despite your best efforts, you can’t locate the necessary guidance within our FAQ, don’t hesitate to contact me directly.
Drop me a message on Twitter. Remember, no problem is insurmountable.
Don’t let any hiccups deter you from enjoying the full potential of Volume2.
Thats it!⌗
Now it’s just to enjoy Volume2!

What is coming?⌗
I’m also working on a few more posts on Voulme2 including:
- Theaming
- Device handling
- Scroll on taskbar for volume control and other tips and tricks